I do my hair by my own which is very easy for me. I don’t need to worry about pay for stylist which could be very expensive if you do your hair often. So this tutorial will show you how to install your own hair extensions, that’s could save a lot of money for you.
I like to try different hairstyles at any cases. Since I do my hair by my own which is very easy for me. I don’t need to worry about pay for stylist which could be very expensive if you do your hair often. This year I have been giving my own hair a break and wearing a partial weave. I do this by braiding up most of my hair and sewing in tracks/extensions, leaving out enough of my own hair in the crown to cover the tracks.Right now the portion of my hair which I braid up hasn’t been relaxed in 4 months, and the portion that is left out has not been relaxed in 3 months. I am going to give you a quick picture tutorial showing you how to install your own hair extensions.
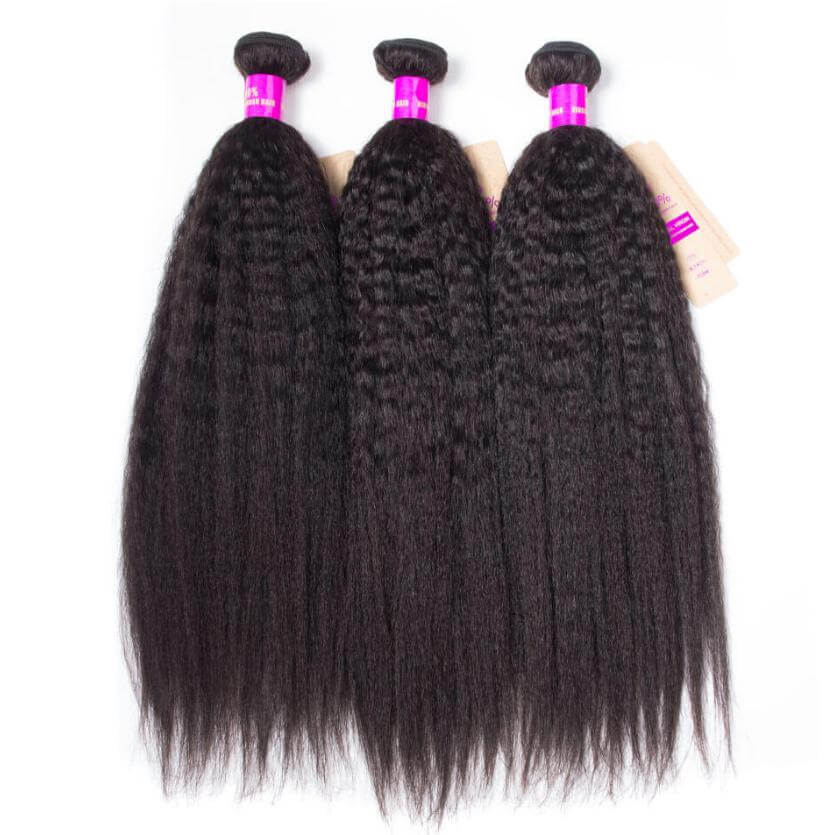
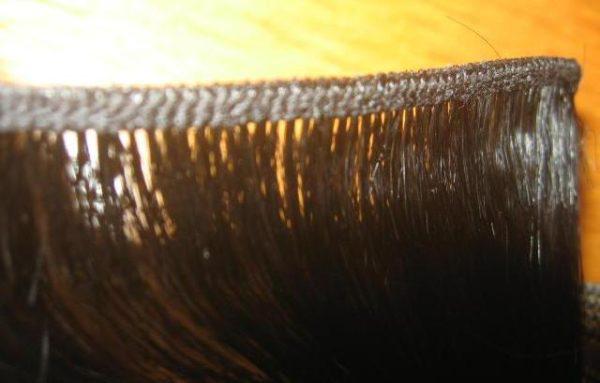
You will need: Weaving hair on wefts, commonly referred to as tracks, as close to your natural hair color and texture as possible.
Weaving thread and a weaving needle, I prefer a hook needle as it’s easier to work with.
You will also need a scissor,comb, brush, polishing gloss and a flat iron or curling iron. Here is the hair that I used for this style, Tinashe Hair in the “Natural Yaki” texture. This is 100% human hair. I paid $30 (USD) for one 10 inch bundle of hair. The color is 1B which is a dark brown/ off black shade.
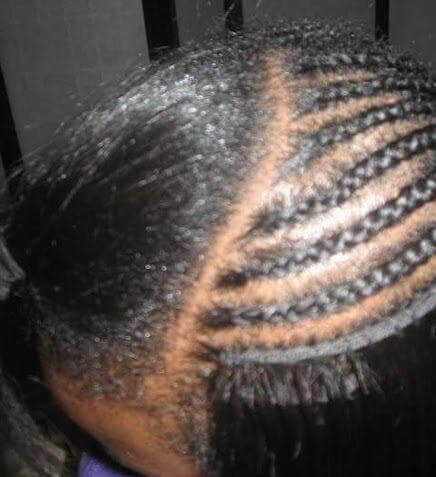
I begin by washing my own hair and putting in a hot oil treatment. I then gave it a 1 inch trim, and braided it up, leaving out my bangs and enough hair in the crown to cover the tracks. I choose different braid patterns for different styles, for this style I chose to braid my hair straight back in cornrows and connected the braids into 1 going across the back of my head. The bottom row of hair closest to the nape, I braided into 1 braid going across and also connected the ends into the braid mentioned above. I braid my cornrows with weaving thread so that they will stay tight and not come undone when I wash my hair. Here is my poor attempt at a diagram.
I then tucked the loose ends under the braid and secured with thread. You then measure your track for the first row from one side of the braid closest to the nape to the next, cut the track to the correct length and sew the track onto the braid. I usually sew from left to right. You do this for each additional row until you get to the crown.
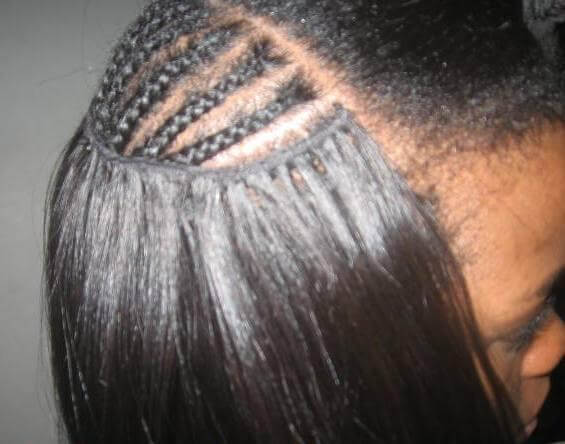
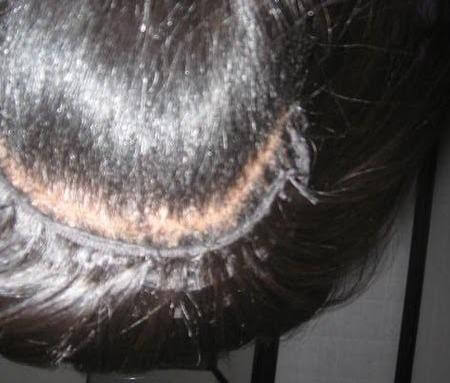
I then comb the hair left out in the crown down to cover the tracks, apply the polishing gloss and flat iron my natural hair to blend with the tracks. Since I have a lot of new growth, I pay extra attention to my roots. I then trim the ends of the extensions to define the layers and frame the face, and slightly bump under the ends with the flat iron.You should not be able to see any tracks.
For maintenance, I wash my hair every 1 and a half to two weeks in the shower. I dilute some shampoo with water in a squeeze bottle and use that to get to my braids under the tracks. Rinse thoroughly. I then apply a hot oil treatment to my braided hair and the extensions and let sit with a plastic cap for a half hour. Rinse thoroughly. I then let my hair air dry for a few hours and blow it out with a comb attachment the rest of the way. I flat iron out my roots and hair to cover the tracks and bump the ends of the tracks with the flat iron. I then wrap my hair around my head in a doobie wrap and cover it with a silk scarf. I comb it out in the morning to bouncy hair with a natural bend to the ends.
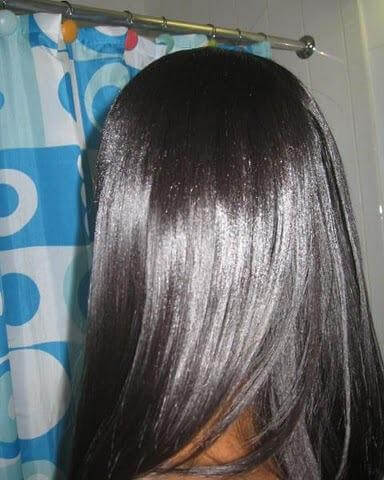
With this maintenance, this style lasts me 2 to 3 months. When it is time to take out, I strongly suggest that you let someone else help you unless you really know what you are doing. It is a very tedious and time consuming task and you can possibly cut your own hair if not careful.
Let me know if you have any questions.

How do you deal with humidity and sweat with your leave out?
How many bundles did you use?